ACT! on the Surface Pro 3

Ya know how we know that the Microsoft Surface Pro 3 is a hot new device?  Because we get support calls about getting act! to work on it just about daily.  So we picked one up just to play a bit, and grab a few screen shots to help you Surface Pro 3 users get your act! together. (Insersurface-pro-3-300x205t cheesy comedy drums here a la buh dum dum.)

The Surface Pro 3 touts itself as the tablet that can replace your laptop.  Well, maybe.  It is fast, with it’s Windows 8.1.  That’s one thing to consider when setting up your act! on the device.  Can your version of act! run on Windows 8.1.  You do need act! 2013 or newer.  (Don’t have a version that new?  We’re happy to help with upgrades!)  Installing act! on the Surface Pro 3 isn’t so much the issue.  The calls we get are about the dialog boxes, field labels and anything else font related being, well. . . screwy.  Let’s look at why and how to work around that.

One thing is, the Surface Pro 3 has a pretty amazing display, capable of resolution you’d see on a 24″ or larger monitor.  The Surface Pro 3 comes out of the box with a default resolution of 2160 x 1440 pixels.  On the tablet-sized screen, this means the default font would be so tiny, no one over the age of 25 can see it.  To sort of work around that, Microsoft bumped the scaling in the Display Settings up to 150%.  That means in many programs, in our case, act!, things wrap all goofy, buttons are bumped off the screen, and dialog boxes are simply messed up.  Now, on to the work around. . .


Once you have act! installed on your Surface Pro 3, here are a few steps to improve your act! experience on your new Surface Pro 3:


1. Open a run prompt (Windows Key + R)
2. Type Control Panel
3. Click OK (or hit ENTER)
4. Click Displaysurface-4
5. Check the box “Let me choose one scaling level for all my displays”Surface-6-300x85
6. Change the scaling option to Smaller – 100%
7. Click Apply
8. Sign out and back in to Windows for the change to be applied


This takes care of the exaggerated font size, but now everything on your Surface is teeny!  We can fix that too.:

1. Right click anywhere on your Desktop
2. Choose Screen resolution
3. Change the resolution to 1600 x 900.
4. Click Apply

Take a look and see if that resolution works, if so choose “Keep Changes”.  If not, click Revert and try another, lower resolution.  The combination of these things should make your act! experience, and your eyes, far happier!

Not completely comfortable with all of this?  Give us a shout, we can certainly help.  Call us at (614) 221-0276  or e-mail support@trilogycrm.com.

The ACT! Scheduler

The ACT! Scheduler – Scheduled Sync

ACT! has included a handy little application called the ACT! Scheduler for quite a while now.  It gets installed automatically and is rarely used.  Up until the most recent versions, TrilogyCRM has not recommended using the ACT! Scheduler for your synchronization tasks.  Mainly because the scheduler did not notify the user of a failed sync.  We would have angry customers because they were assuming that the syncs were running every hour – when in fact the database had not synchronized for weeks.

The newest versions have the ability to setup email alerts. Woot Woot!  Follow the steps below to setup the scheduler.  If you will be setting up the email alerts – you will need to complete the email alerts FIRST.


Setting Up Email Alerts

  1. Click on Start button and find the ACT! Scheduler (located under the ACT!)
    Step1
  2. This will launch the Scheduler Settings Dialogue box.  Click Set Up E-Mail Alerts. Step2
  3. Your settings may vary but if you have a Gmail account (which I think everyone does at this point) the settings for Gmail are listed below.  If you have your own SMTP server you can enter your information.  Check with your Email Administrator for the settings.  This is not something that TrilogyCRM can support or assist with as we do not host your Email.   Once you enter the information you can click the Test Connection button and verify the settings are correct.
    SMTPSettingsForGMail

Setting up the ACT! Scheduler – Scheduled Sync


  1. Click on Start and find the ACT! Scheduler from the start menu. (Located under the ACT! Section)Step1
  2. Click on Create A Task
    Step2
  3. The next step is the most tricky for end users.  This step is asking you “Where is the database you would like to use to setup the scheduled task?”.  If you are a TrilogyCRM Hosting customer and followed the documentation – your database is located in the C:\ACTDATA folder.  Click the Browse button on the screen and “find” your database (PAD) file, highlight it and click OPEN.
    Step3
  4. Now – this is the really tricky step.  You have to enter your username and password.  This is your username and password that you use to access ACT!  Don’t say it… Yes you do have a username.  Everyone who uses ACT! has a username.  You may not have a password but the username is usually your First Name and your Last Name. (i.e. Chris Huffman)   If you don’t know this information, you will need to check with your administrator for assistance.  Once you have updated your username – click NEXT.
    Step4
  5. This window will allow you to select the type of Task to schedule.  For this Quick Tip we are scheduling a Database Synchronization (remote database only) – select this option from the drop down and click NEXT.
    Step5
  6. Set a Schedule – this window will allow you to setup the schedule on which the syncs will run.  We’ll define the suggested settings – but feel free to adjust to match your working pattern.  Select Hourly from the Occurs Column.  We work a normal business day so Starting at 8:00AM and ending at 5:00PM is fine (adjust this to end just AFTER you normally end your day).   Change the Every drop down to 1 hour.  You can see when the task will run from the “Task will run at” indicator.Tweak your settings and click NEXT
    Step6
  7. The final step is to set up the Send Notifications settings.  In order to send notifications you are required to FIRST setup the Email Alert Settings (detailed above).  If you did not setup the email settings – the Send e-mail notifications checkbox will be disabled.  If you did setup your SMTP server correctly – you can check the checkbox and enter the email address that you would like to have the notifications sent to.  Click the Send Teste E-Mail to ensure that your system is complete.   Click Finish.
    Step7

Congratulations! You have setup the ACT! Scheduler to automatically synchronize your database!  Now get back to work and let the scheduler handle the sync’ing for you.


Backing up ACT!

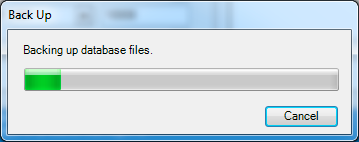
The following steps will assist you in creating a backup of your ACT! database. These instructions are provided to assist you in preparing your database to be uploaded to the TrilogyCRM ACT! Hosting  Server.  Please note that Act! has security features which apply to backup functions. Only Administrator and Manager level users have access to the database backup and restore functions. If you are unable to access these functions, please contact your Act! Administrator.

Read more

Registering ACT!

The first time that you launch ACT!, you will be asked to register ACT! and then activate the software.

Please use the following steps to register the program:

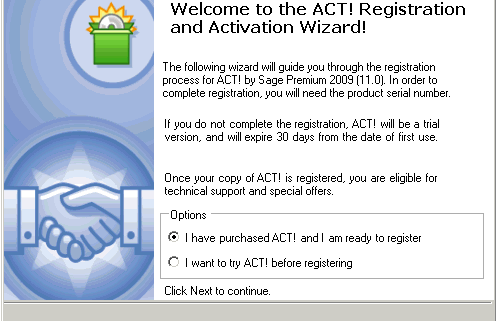
Launch ACT! and go to the Help menu then select Register ACT!.  The ACT! Premium Registration and Activation Wizard – Welcome dialog box appear

register-act-1

If you are using the trial version, enable the I want to try ACT! before registering option click Next and ACT! will launch. Otherwise, click I have purchased ACT! and I am ready to register and click Next. The following Enter a Serial Number dialog box appear Read more

ACT! and Quickbooks

From time to time, we receive requests to add fields into ACT! that really should be tracked in an accounting system.  We always explain that ACT! is for your sales and contact management, and Quickbooks, Peachtree, or any other accounting package should be used to track receivables or COGS.  Generally speaking, each program serves a very specific purpose – one for tracking Contacts, the other for tracking numbers.  That distinction is a consulting issue we like to make clear, but there is value to sales seeing some accounting data.  Wouldn’t it be helpful if a sales rep could see that a customer has an outstanding invoice before they sell the next deal? Read more

Your Virtual Assistant – ACT!

Most sales gurus will tell you that staying in touch is one of the most important things we can do as good sales people.  Some go so far as to prescribe a minimum number of touch points you should make.  I’d like to think I know a thing or two about selling.  I’ve been selling since I was 16, everything from cold call telemarketing to my current CRM career.  And, yes, I’ll brag a bit.  Trilogy has been in the top 25 for Sage ACT! sales for the last 7 years.  If you ask me what the most important staying in touch tactic is, I have to go with remembering to stay in touch.

So, how can you ensure that?  Schedule it in ACT!, of course.    Read more

Beyond Meetings, Calls & Todo’s

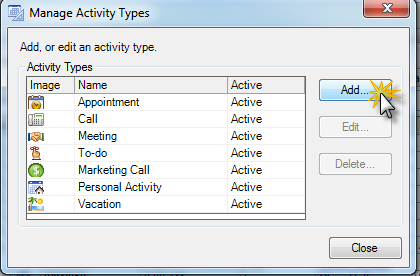
One of the great things about ACT! is its flexibility.  You can tailor so much of the application to fit your process.  Yes, we know most people install it out-of-the-box and never even relable a single field.  (Shameless plug, we can help with that!)  One of the simple ways you can customize ACT! to your process is by creating Custom Activity Types.  Because each company’s process is slightly different, the old Meeting, Call and To-do options just don’t cover it.  We have customers across almost every imaginable industry.  Pharmaceutical reps need to track their doctor’s office “Drop Ins”, another company needs to schedule “Equipment Deliveries”, and yet another has and Activity Type of “Install”.   Sure they all have Calls, Meetings and To-dos also, but they have those just outside the box items that warrant a custom type.  In the latest versions of ACT!, you, or your trusted TrilogyCRM ACT! CC, can customize the Types.  Read more

The ACT! Knowledgebase

O.K., so it’s 11:45 at night and you need to run this report to send to your boss for the 8:00 a.m. staff meeting, you run the report and get an error message. Now what? During normal business hours you can always reach out to support@TrilogyCRM.com, but that email may or may not be read at 11:45 at night. And, in this economy, why not take advantage of the free option? Anytime, 24/7, and always free, you can use the ACT! Knowledge Base.

Go to http://kb.sagesoftwareonline.com and click on the Search option. Then, pick your Product (choose “ACT! by Sage Family of Products”), and choose your ACT! version. In the “Search by Keyword” field, type in your error message or question.

The results can be all over the place, but if you have a specific error message your odds are good to get a direct hit. When searching based on general questions and how-to’s, like “how do I mail merge”, can be more difficult. With resourceful wording, and once you get the hang of searching, you can definitely find answers.

The ACT! Knowledge Base is the tool that we use when find ourselves with an error message that we haven’t seen before. The directions are well written and usually include pictures to help you along. So, next time you find yourself in an ACT! bind, remember you always have a free resource – the ACT! Knowledge Base.

Relationships

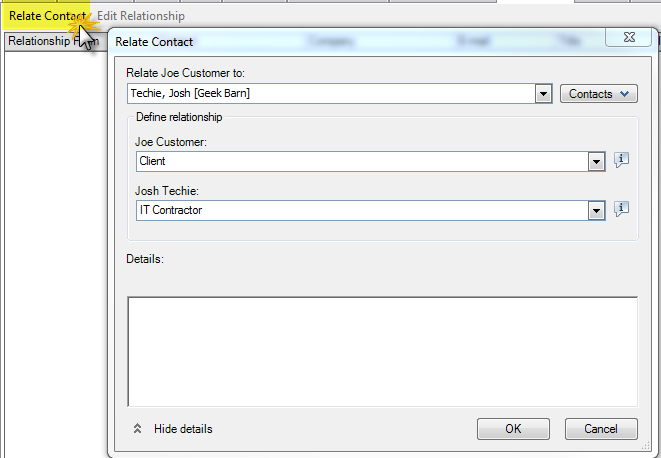
It’s always fun to point out features in ACT! that we know a customer hasn’t noticed.   There is a little tab in ACT! that a lot of users overlook – the Relationships tab.  The obvious use is to track the basic Org Chart type information.  It’s a great place to relate managers to team members, sales reps to sales managers and the obvious assistants to the person in charge.   When working with our customers, we may have an IT Contractor, a Sales Consultant, or an ACT! Certified Consultant related to the customer.  Those are all relationships we’d like to keep tabs on, or should we say, keep on this tab.  Read more